
Before your team can start handling conversations, you need to connect and configure these channels. That’s where the Channels Configuration Module in Antlere Interact comes into play.
This module acts as the setup hub, allowing administrators to integrate and manage various customer communication channels from a single interface.
What Does the Channels Configuration Module Do?
At its core, this module is designed to:
✅ Integrate different communication channels – Connect your business with platforms like WhatsApp, Facebook, Twitter (X), Email, and more.
✅ Manage channel configurations – Ensure each channel is properly linked and ready for customer interactions.
✅ Monitor channel connectivity – Check which channels are active and address any configuration issues.
Unlike other parts of Antlere Interact, this module does not handle messaging, automation, or conversation management. It simply ensures that the required communication channels are available for use.
How It Works
Step 1: Selecting Channels for Integration
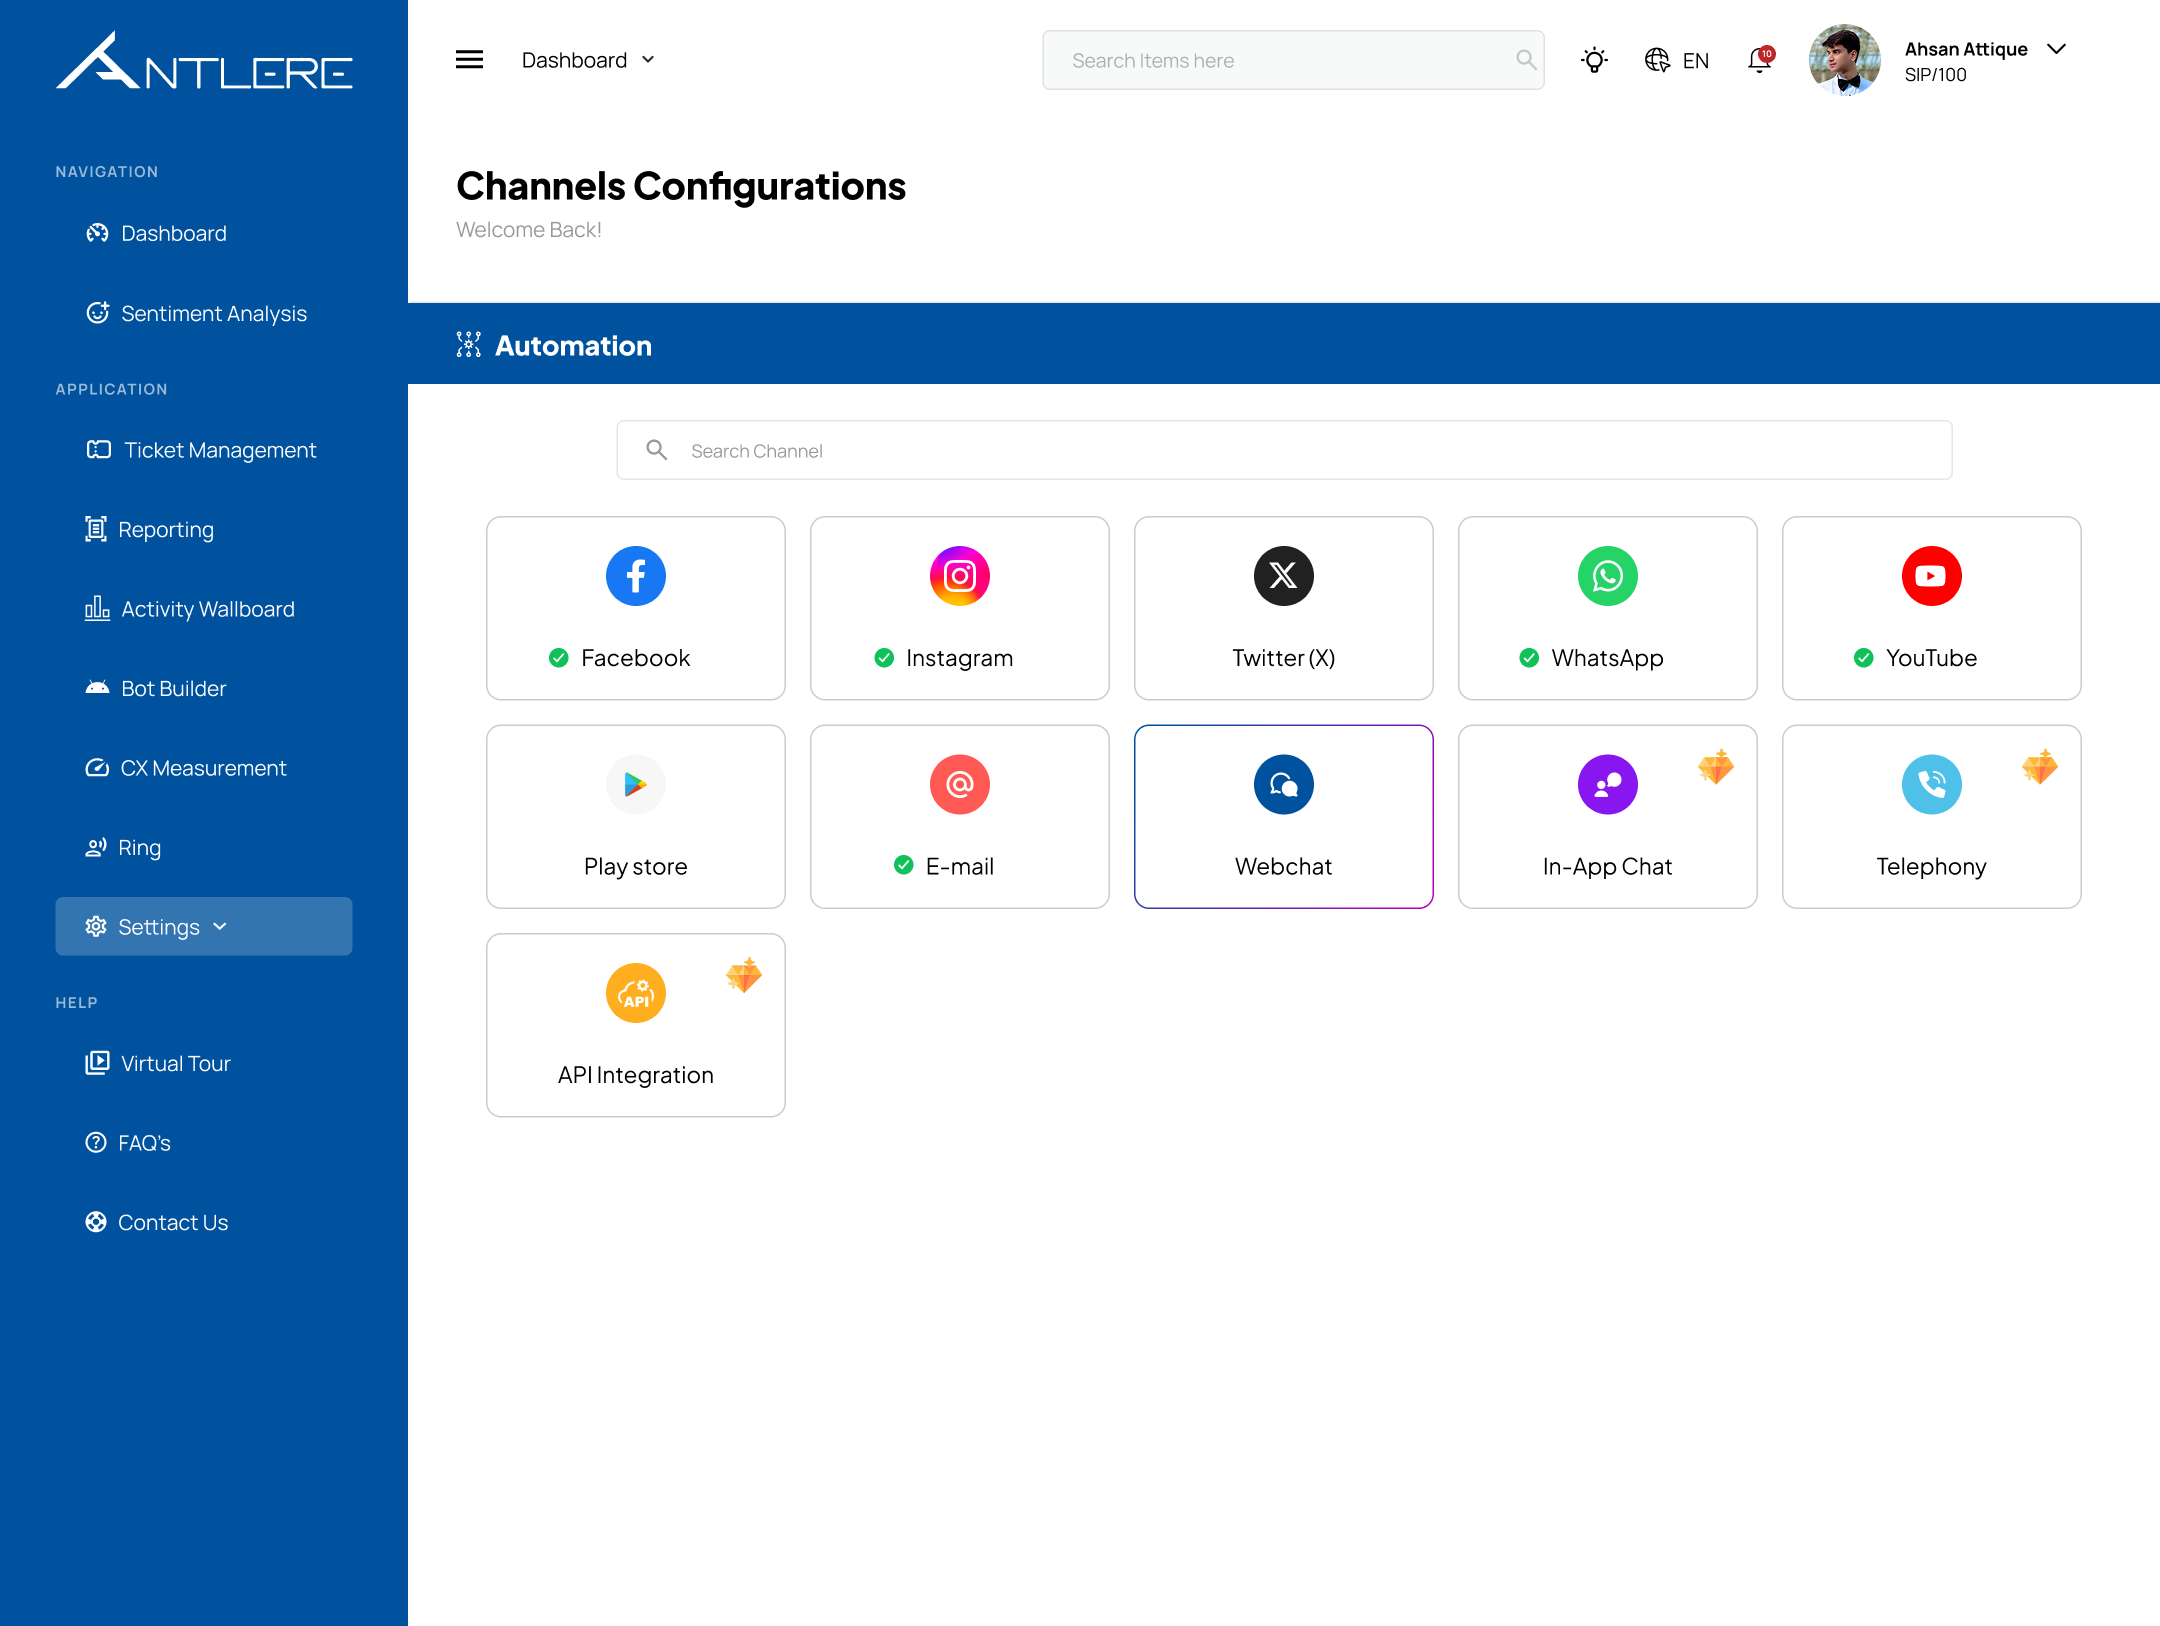
When you access the Channels Configuration Module, you’ll see a dashboard with all available communication channels, including:
- Social Media Platforms – Facebook, Instagram, Twitter (X), YouTube
- Messaging Apps – WhatsApp, Webchat, In-App Chat
- Email & Traditional Communication – E-mail, Telephony
- Other Integrations – Play Store Reviews, API Integration
Note: Antlere Interact also provides customized channel options that can be integrated into your panel.
Each channel has an indicator showing its status:
- 🟢 Green Checkmark – Successfully integrated and active.
- 🟠 Premium Plan Icon – Requires configuration
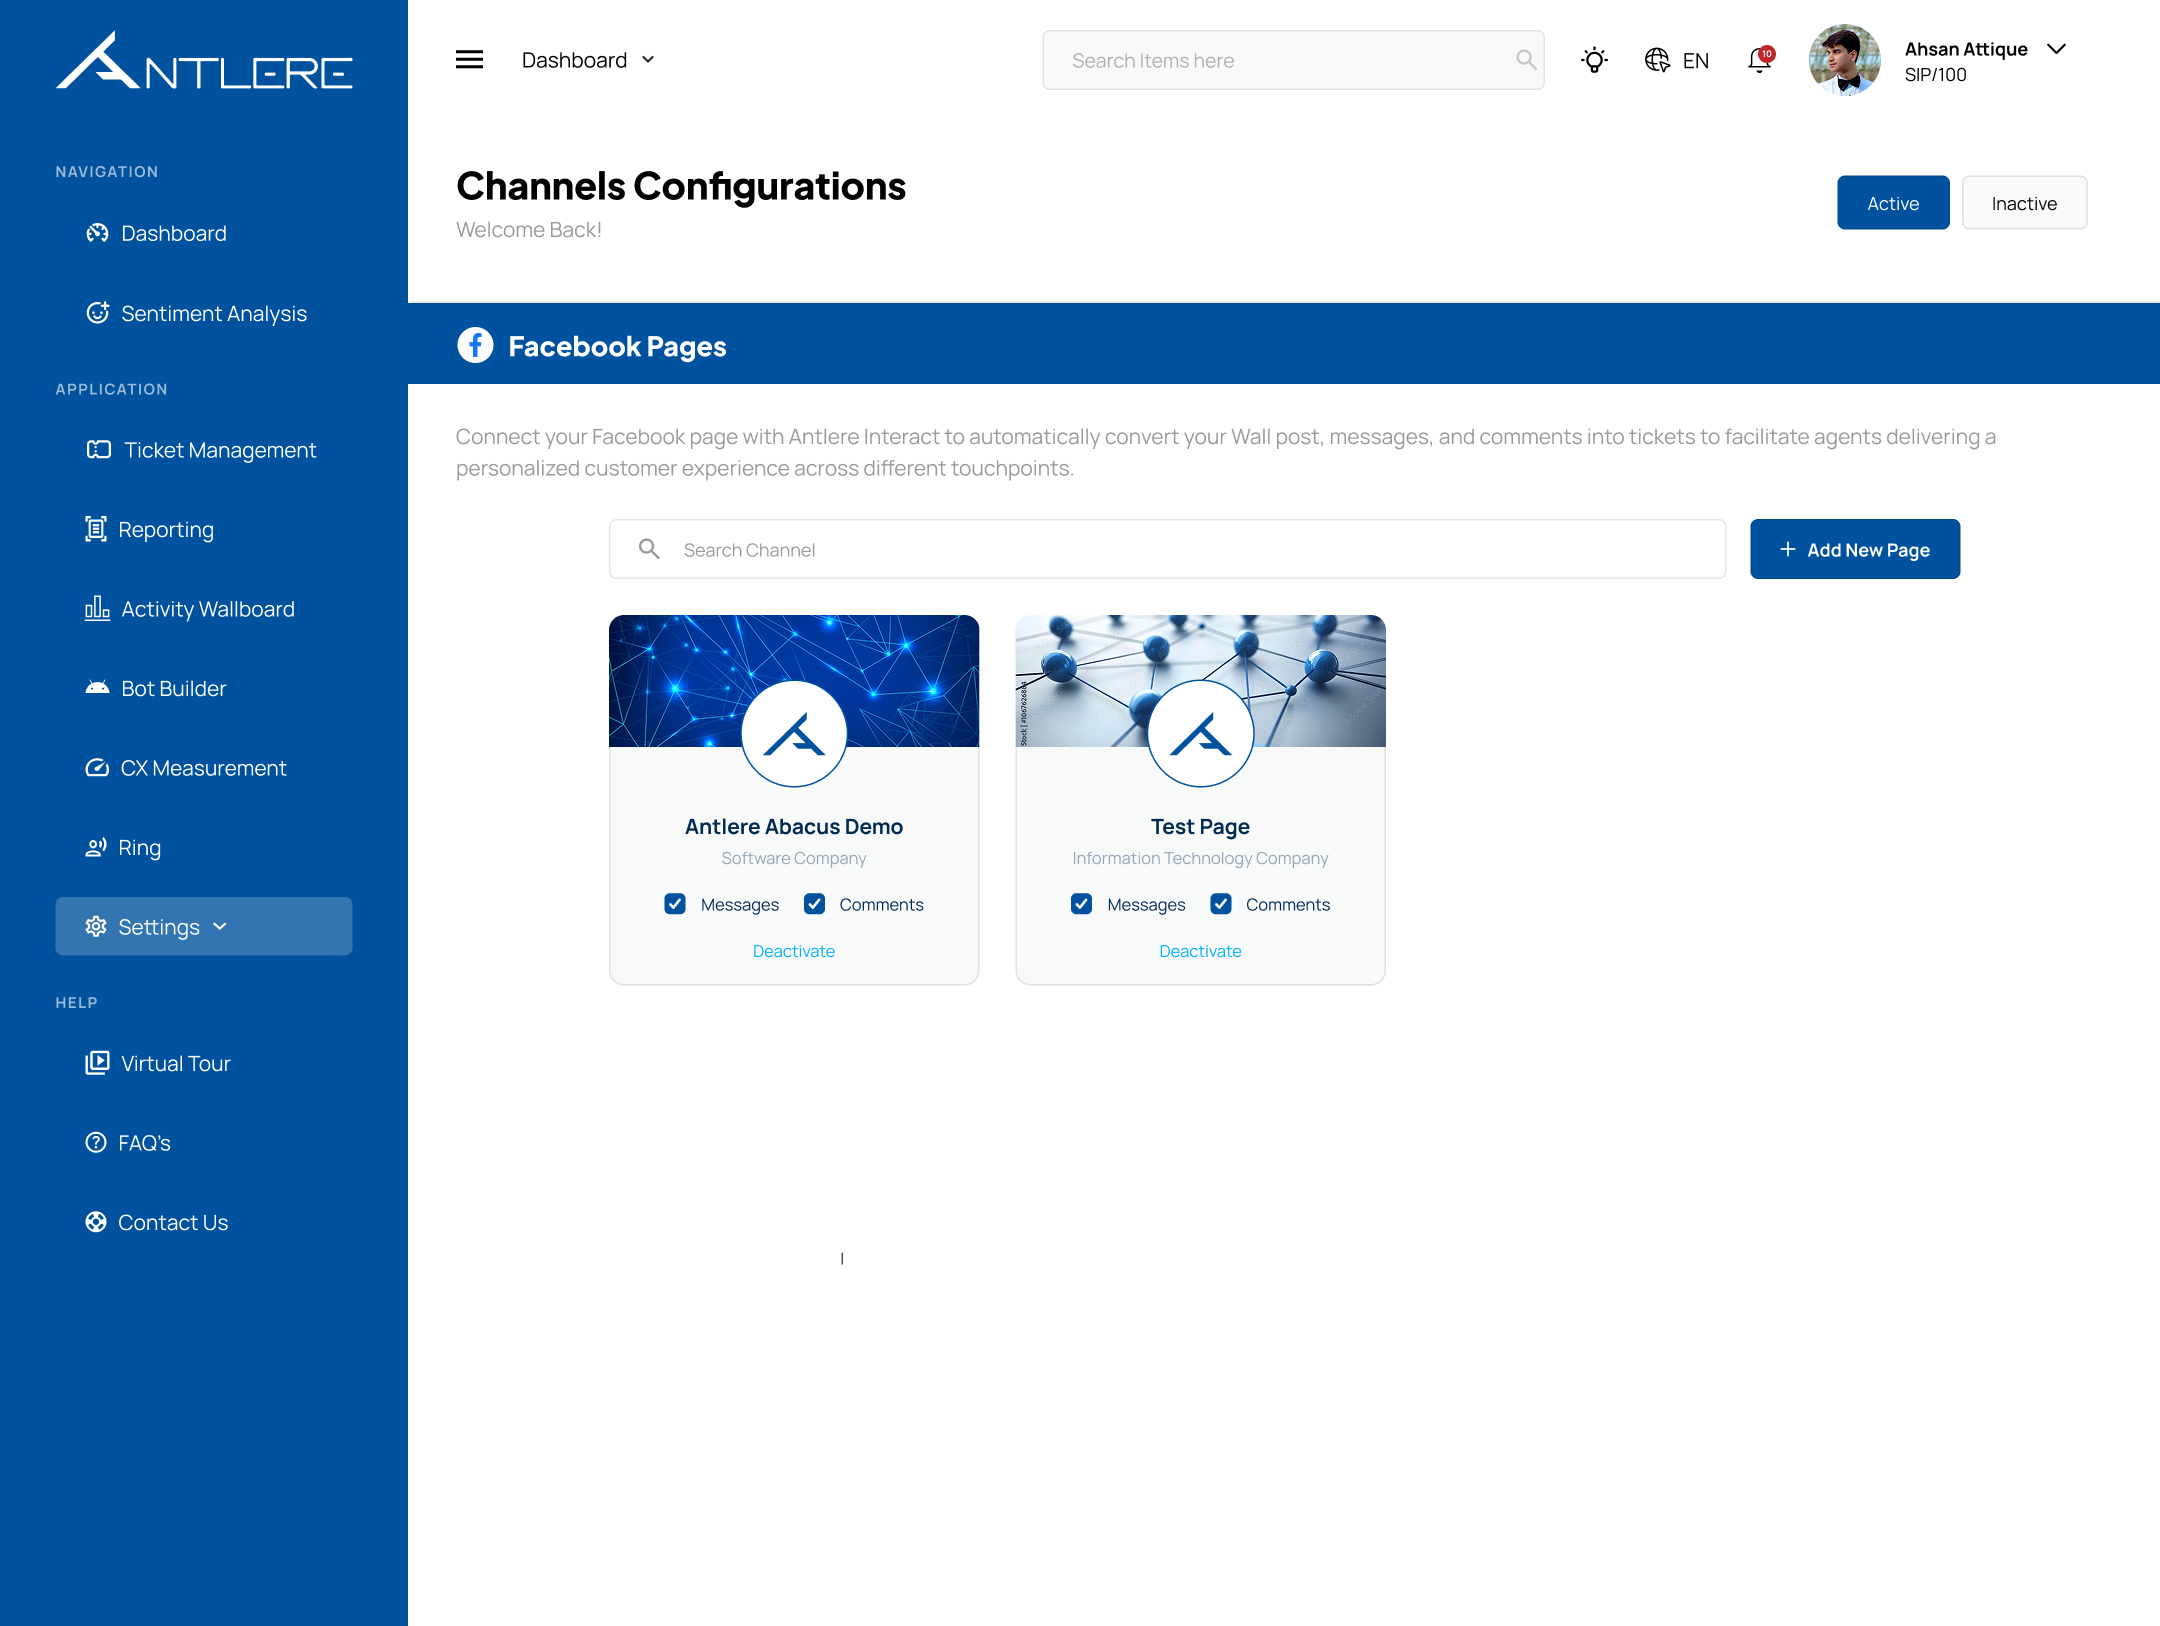
Step 2: Configuring a Channel
Once a channel is selected for integration, the admin can connect to it by entering the required credentials and API keys. Some channels may require additional authentication steps, such as verifying ownership.
For example:
- To connect WhatsApp, you need to enter a business number and link it with an official WhatsApp Business API.
- For Email, you’d configure SMTP settings to ensure messages are sent and received correctly.
Each channel has its own setup process, ensuring that it functions correctly within Antlere Interact.
Step 3: Ensuring Proper Functionality
After integration, admins can:
✔️ Verify connectivity – Check if messages can be sent and received through the configured channel.
✔️ Troubleshoot issues – If a channel is disconnected, admins can reconfigure it or update credentials.
✔️ Enable or disable channels – Only activate the ones your business needs.
Once the setup is complete, agents and automation workflows can start utilizing these channels for customer communication.
Why Is This Important?
Without proper channel integration, customer conversations can’t happen. This module ensures that every business using Antlere Interact has a fully functional communication setup, so when customers reach out, there are no gaps or disruptions.
🔹 Centralized Setup – Manage all channel integrations from one place.
🔹 Flexibility – Enable only the channels that matter to your business.
🔹 Scalability – Easily add new communication platforms as your business grows.
In short, Channels Configuration is the first step in building a connected and responsive customer experience. Once all channels are integrated, businesses can then focus on handling conversations effectively within Antlere Interact.